
How QuickBooks and Word Improve Customer Relationships
The pandemic taught businesses a lot of things. One was the importance of staying in touch with customers.
Hard to believe it was more than three years ago that many businesses had to shut down because of the COVID-19 pandemic. Others remained open, but tens of millions of employees had to start doing their work from home practically overnight. It’s amazing that so many companies—both large and small—survived those early days and months.
One of the things that got people through was the ability to communicate in numerous ways: Zoom meetings, email, social media, and other avenues became lifelines as so many of us were separated physically. Maybe you learned that it was more important than ever to stay in touch with customers as we waited out the chaos.
Now that COVID has settled down significantly, have you maintained the customer relationships that you—hopefully—kept up with during the shutdown? Whether or not you did, now’s a good time to explore the automated communication tools that combining QuickBooks and Microsoft Word offers. Here’s how they can work together.
Paper Correspondence is Good
QuickBooks integrates well with Microsoft Word, producing business letters from templates in the software. You can, of course, compose your own, but there are numerous pre-written letters that may serve you well. You can copy and paste the finished product into an email, but it’s nice to get a printed letter in the U.S. Mail sometimes. It’s less likely to be quickly deleted. Plus, it looks more official, which some of these letters should definitely be.
Before you start creating letters, you should see what templates are available.
Selecting Your Message
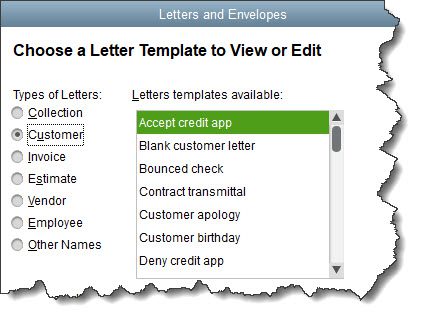
To get started, go to the QuickBooks Customer Center (Customers | Customer Center). You’ll want to see what your options are, of course. So with the Customers & Jobs tab highlighted, click Word in the toolbar and select Customize Letter Templates, then click View or Edit Existing Letter Templates and Next. You can see a partial view in the image above.
Click the button in front of Customer in the first column, then highlight Customer apology in the second. Then click Next. Word opens and displays that letter template. Every element of the letter that will be replaced with your own QuickBooks data contains a merge field surrounded by arrows, a kind of placeholder that shows you which fields will be replaced, and with what. Warning: Don’t edit this template unless you want to use it on all subsequent letters of this type.
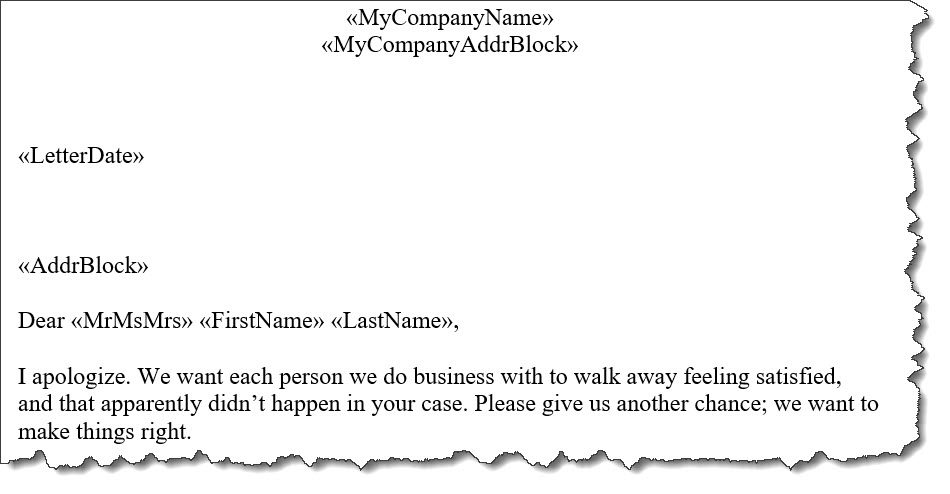
Word inserts merge fields to show you where you own QuickBooks data will go.
Defining Your Recipients
Minimize the Word document and return to where you left off in QuickBooks. Click Use Template. Click the correct buttons to indicate whether you want to see Active or Inactive customers or Both, and it you want the list to contains Customers or Jobs. Click Unmark All while you’re doing this test run, so you don’t load up your Word documents with too many letters. Click in the column in front of two or three of them.
Click Next, and if Customer apology isn’t highlighted, go ahead and click it. Click Next again. In the window that opens, enter the Name and Title that should appear. When you click Next, Word will create a personalized letter for each customer you selected. Each letter will start on a new page, so you’ll have to scroll down to see them all. You can edit the individual letters. This will not affect the original template.
A Potential Problem
Depending on how thorough your customer records are, you may get an error message saying your mail merge contains **MISSING INFORMATION**. Most often, you haven’t chosen a salutation for each individual you selected for the mail merge. You can either:
- Cancel the mail merge and add the missing information in each record, then start over again, or
- Delete the merge field from the letters you created.
Since this is just a test run, go ahead and delete **MISSING INFORMATION** from your letters. Back in QuickBooks, click Cancel in the window that opens since we won’t be printing envelopes. You’re done with the mail merge wizard now, so you only have to deal with the letters you’ve created. You could save them as a group if you wanted to or just print them to mail to customers. You would treat them like any other Word document.
Some Alternatives
There are multiple ways you can proceed with your mail merge.
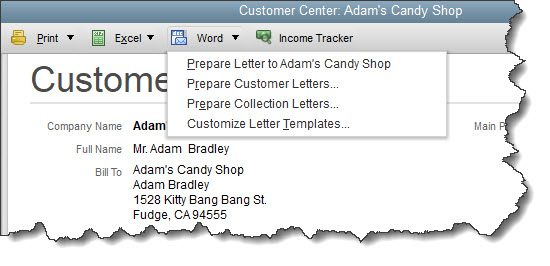
Now that you understand the basics of mail merge in QuickBooks, we’ll go back to the beginning and look at three different ways to create mailings. With the Customer Center opens, click Word again. You’ll see your other options here. You can create a letter for only the highlighted customer, choose your customers first, or prepare collection letters. The latter requires that you set up a filter for your mail merge (date range past due).
Different Business Flows
This may be your busy season, or your business may slow down during the summer months. But customer relations isn’t a seasonal activity. We suggest you keep up with needed correspondence throughout the year. If you have questions about mail merge or any other QuickBooks features, please do contact us. If not, enjoy these warm months!
SOCIAL MEDIA POSTS
Did you know QuickBooks has built-in mail merge capabilities with Microsoft Word? We can walk you through it.
Customers behind on invoices? You can create a mail merge in QuickBooks to send collection letters using Microsoft Word.
Not familiar with mail merge in QuickBooks? The software contains a wizard to walk you through it.
Good customer relationship management requires communication with customers. QuickBooks can facilitate this. Ask us.